Showing posts with label in the kitchen. Show all posts

Wednesday, August 27, 2014

Labor Cake


"It's a BUNDT...T"
"THERE'S A HOLE IN THIS CAKE!"

Well, I'm posting this up from the comfort of my home office, so clearly, this didn't work. Or I didn't eat enough. One or the other. BUT! If you are looking for an amazingly moist and gooey chocolate cake recipe - look no further. It's rich and decadent and takes a simple box cake to a whole new level.

I found the recipe here when searching "labor cake"on Pinterest. I figured, the baby is due, and I'm not in labor. Best case scenario: I learn what contractions really feel like and maybe finally get to meet my little man. Worst case scenario: I get to eat some yummy chocolate cake. It's pretty much a win:win situation, don't you think?

I don't really believe that anything you do or eat is going to kick start labor. Baby Boy is going to make his appearance when he is ready, and I am learning to be OK with that. I also don't think that a chocolate overdose is going to do a darn thing to my uterus to jump start this. But I'm starting to get a little restless at home bouncing on my exercise ball all day and baking a cake was the perfect diversion for a good part of my day. Cleaning up the dishes afterward, however, was not.

So here it is: LABOR CAKE - or Labor Day Cake - if you need a recipe to take to that potluck this weekend!

  • 1 box of chocolate cake mix (I used Betty Crocker Butter Chocolate Cake)
  • All the ingredients the box mix requires: usually water and eggs, maybe oil or butter
  • 1 package of chocolate instant pudding mix (I guess if you wanted to get creative you could try a different flavor)
  • 1 cup of sour cream
  • 1 1/2 cups of chocolate chips
Mix all of the ingredients in a large bowl until smooth. Pour into a greased bundt pan and cook for about 45-50 minutes at 350 degrees F, until a toothpick inserted in the center comes out clean.  

You can also make this as a sheet cake or in rounds, but the cook time will vary. 

If you are making a bundt, I used the same website's recipe for the glaze, sans the vanilla extract (because I forgot). If you're making a sheet cake or rounds, you can use canned frosting or another recipe. 
  • 1/2 cups cocoa powder
  • 1 1/2 cups sugar
  • 1 1/2 sticks of butter
  • 1/2 cup milk (I used almond milk because it's what we had)
  • 1/2 teaspoon salt
In a sauce pan heat all the ingredients together until smooth. Continue to stir until it thickens slightly. Remove from heat and allow to stand. It will thicken up a bit more. When it's the desired consistency, drizzle over the tops of your bundt cake for that extra chocolate rush that might just make your belly contract! 

Enjoy! And if anyone DOES go into labor from this cake, either don't tell me because I'll get frustrated, or tell me it was because you ate the whole darn thing. I had to stop at one piece because it's so rich and delicious. Baby Boy liked the sugar rush too, he was moving around all night. Just not moving out yet.

XO


Tuesday, July 29, 2014

My morning smoothie


These mornings I have been loving me a good smoothie. We've been using our nutri-bullet (like a magic bullet, but more nutritious) for quick morning breakfasts. Even though I'm just hanging around the house and don't need the "quick" part, I've been trying to have more fruits and eat healthier, and this has been the perfect start to my day. Not to mention it's super simple and in the end I only have 3 very easy to clean parts in my sink! My go-to recipe lately is one I made up and super yummy, I call it the Banana Berry smoothie (very original...). So here it is, in case you are so inclined to make one yourself.

The Banana Berry Smoothie:
*all measurements are approximate! Sorry!

-3/4 cup plain yogurt
-4 oz. chocolate almond milk (sweetened or unsweetened)
-1 whole banana
-1 cup frozen berry mix
-1/2 cup honey oat granola (or any granola)

Blend until smooth and enjoy!

XO

Thursday, February 6, 2014

52 Soups: Challenge Complete

Ok, so I've been slacking this month. So much for the "this year I resolve to blog more" deal.  January has come and gone and I still have a list of incomplete ideas that I've been meaning to write about.


2013 was a pretty incredible year, and one thing that will forever set it apart from every other year in my life is definitely that I ate WAY more soup than I will probably ever eat again in a whole year.  The 52 Soup Project started out as a simple challenge.  Something that would get E and I in the kitchen together, learning new skills, using our new kitchen tools, figuring out how to be adults in our new grown up kitchen. What started out as just an idea to blog about turned into an amazing adventure.

Not only did we learn how to make some incredibly new things, I'm still amazed at the real way to brown onions for French Onion Soup and how to even fathom making Gumbo, but we also realized how much we love cooking, and how much we really love sharing our food, and ideas, with you.

I think the most exciting thing about the whole project has been watching everyone's reactions. At first our only readers were our parents, eager to help support and try out our ideas. But slowly, as the recipes got a bit more unique, and we figured out how to post it to the world, our readership grew. We'd get comments from people we work with, "When are you going to bring us some of that soup?!"  And the best is when we'd find out other people had tried our recipes and loved them too!

Since 2014 started, one of the weirdest things has been not having to post a soup every week. It's remarkably freeing and sort of sad all at the same time. Surprisingly, we aren't sick of soup. In fact, it's still one of our favorite things to eat. And we actually haven't made any of the same soups we made last year.... which means we've made over 52 soups in the last year and a half or so that we've been married!  That's more than most can say about the number of soups they have in a lifetime! :) So that's pretty neat.

And on to the next project?  We wanted to have a project up and ready to go for you by the new year... but honestly, we can't decide!! We've tossed around ideas for months and some nights we have trouble figuring out what to eat, let alone what sort of project to go with and commit to. Whatever project we will be...one thing we DO know... it will NOT be another "52" anything! While it was super fun.... we'd already be like 6 weeks behind AND really, a soup a week, or a _____ a week. That's a LOT!  We had fun with it, but we're not putting ourselves through that again.

So whatever we finally decide on, we'll keep you posted. It will be yummy, and fabulous, we just have to figure out what it will be.  Until then... happy 2014. happy February.

it's good to be back.

XO

Monday, August 12, 2013

the-grapeleaf


Alright, so if you've been following this blog for any length of time (OK, in this last year), you know that cooking has kind of taken over our live here in our home.  It was something we totally didn't see coming, but looking back, I don't know how we didn't. E and I have nights where we cook some elaborate dinner and then pick it apart. "It's good, but is it restaurant good?"  We have these off in the distance dreams of opening a restaurant, cafe, catering business, what have you, and how awesome it would be if we could just cook all day and watch people enjoy what we've made. Then we watch something like "Restaurant Impossible" and realize that these dreams are so much more work, but hey, when you're dreaming, you get to wear rose colored glasses.

In the meantime, we thought... let's blog. I mean, why not?  I'm already posting all our soups here (I know, I'm behind again...) but we do make so many other yummy things that we don't often get to share with you all. And really, that's the best part of cooking something delicious...sharing it.

SO.... welcome to the grapeleaf.  It's our kitchen table on the internet. It's where you can pull up a chair and be a part of the conversation while we chat over blistering tomatoes or fresh baked blueberry muffins.  We want to open up our kitchen to you and invite you over to dinner here.


Our first post is up, and while it ebbs on the side of partially cheesy we promise to bring you some delicious (sometimes cheesy) recipes and stories from the kitchen.

So pull up a chair and visit us at the grapeleaf.

XO

Tuesday, July 30, 2013

One pot pasta

I've been seeing pictures flying around facebook and pinterest of all these veggies and noodles in one pot, ready to go. A quick dinner recipe that is going viral. Even our travel agent was telling us to make it.  So last night, with no clue what to make for dinner I thought, why not!?

I got my original recipe here. But, clearly I am not the greatest recipe follower, as I ran into some hiccups. Nevertheless, this pasta came out really delicious. Since everything cooks together, the starch that leeches out of the pasta isn't rinsed away like it normally would when you make pasta and it mixes with the broth and creates a creamy-like sauce.   This is a super tasty, easy recipe for dinner tonight, or whenever.


What you need:

  • 1 package fettuccini or spaghetti
  • Chopped up vegetables - how much you use depends on how much you have. I used two chopped tomatoes (it could have had more) and one large chopped up zucchini (this came out amazing in the pasta, FYI). I also used a whole white onion and two cracked cloves of garlic. You can try different summer squashes, fresh basil leaves, etc. Whatever you think will taste good, and that will cook in about the same amount of time as the pasta.
  • Spices for flavor - I used oregano, but you can also add Italian Seasoning, dried basil, crushed peppers.
  • Olive oil for drizzling
  • Vegetable broth - the original recipe calls for 4 1/2 cups, I think you need to use just enough to cover everything in your pot. I think 5 cups would have been good for mine. 
How to make it:

I was gearing up to take a picture, so I placed everything strategically in the pot so you could see what I had in there. But I sort of think it's a good idea to place all your ingredients in the pot this way, just to make sure you don't have SO much stuff that you're going to have overcrowding and risk under cooking. 

So add everything into your pot: the pasta, the veggies, then cover it just enough with the vegetable broth so that you can see everything nicely still, but it's all going to be covered and cooked evenly. Drizzle a little olive oil on top and season with your spices. 

Place the pot on medium high heat and bring to a boil, stirring frequently (every 2 minutes or so). This is a crucial part and one I didn't read until it was almost too late. Because you are working with less liquid than when you're making pasta regularly, you need to stir frequently to prevent sticking and to make sure everything gets evenly distributed in the broth. 

Once boiling, drop down to medium low heat and allow it to simmer about 10 minutes (still stirring!), until there is just a small amount of liquid left in the bottom. The original recipe says to cook it out completely, but then your pasta gets sticky/dry, so cook until there is about 1 inch of liquid left in the pan.   


Season again with salt and pepper to taste and mix together well, distributing all the liquid throughout. 

We topped ours off with some grilled chicken breast and Parmesan...delish!  


ENJOY

XO 

Sunday, July 28, 2013

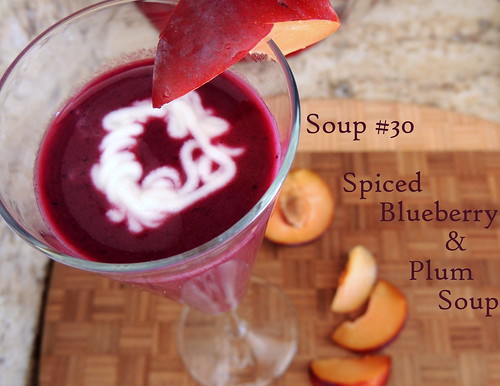
Soup # 30 / Spiced Blueberry & Plum Soup


30

This soup was thought up in some discussion between Nicole (9) and Madi (14) and E. I walked into the office as we were cleaning up from the sleepover and Nicole was writing it up on our idea board. "Blueberry and Plum Soup."  I'm not sure how they came up with it, and I don't think either of them thought I would actually make it. But I'm up for the challenge!  Turns out there are a lot of recipes for blueberry soup. I read through a few of them and then decided to make my own... here it is! Thanks Madi and Nic! 
What you will need: 
1 cup of peeled and chopped plums
1 1/2 cups of fresh blueberries
1 1/2 - 2 cups water
2 heaping (dripping?) tbsp of honey
1/4 tsp of ground allspice
1/4 tsp cinnamon
1 tsp vanilla extract
1 cup of plain yogurt


How to make it:In a medium soup pot, add blueberries, plums, water, honey, vanilla extract, allspice, and cinnamon. If 1 1/2 cups of water isn't enough to float your blueberries and cover most of everything, add in some more, up to 2 cups total. Stir together and turn heat on to medium high. Bring soup to a boil and allow to cook for about 10 minutes, until the blueberries start to burst open.Remove soup from heat and transfer into a medium sized bowl.  Use an immersion blender to puree the soup (alternatively, you can puree the soup in small batches in a blender). Use a fine mesh sieve to strain the soup, using the back of a spoon to press out all the liquid. Discard pulp (or use it in your garden as compost!). Add the cup of yogurt to soup, and blend again, to assure even distribution. Your soup will be bright purple (how awesome is that?). Pour soup into a bowl and chill for several hours until cold. Serve in small bowls or cocktail glasses with a yogurt and plum garnish, or a sprig of mint! Enjoy!


The Verdict: Success!  This is definitely a different soup. But I guess that is to be expected when you take inspiration from a 9 year old. I thought it had a very unique taste to it. Not quite blueberry yogurt, but not some totally out there flavor either. You can definitely get a hint of the spices and it's a good thing.  Over all, I enjoyed it. E on the other hand said it was good, but I'm not convinced he'd sit and have a whole bowl of it.  This is one of those soups that can be served for an appetizer or a dessert soup. It could be drizzled over vanilla ice cream or (and this is one I want to try) made into popsicles. The possibilities are endless and they're all tasty.  

What we'd do differently: E says to use a little bit less all spice.  I say to use a little bit less yogurt. It's got a very thick, shake-like consistency. I'd try maybe a 1/2 cup of yogurt first, and add more until it's just right.  I'd also like to see what it would taste like with a little mint thrown in... but that would be a whole different flavor.  

Try it out and let us know what you think! 

XO

Monday, July 22, 2013

Soup #29 / Chili

29

It is totally necessary to mention, before this recipe, that I came home from work to find my amazing husband slaving over the stove, making this chili.  It's also necessary to mention that this soup isn't just good, it's REALLY good (humble brag...). Like, almost too good (not so humble brag...). It makes you want to keep eating more until you can't possibly eat any more, and then you eat more. So there you have it... you've been warned.

What you will need:
3 tbsp olive oil
2.5 lb ground turkey meat
1 red onion, chopped
1 white onion, chopped
1 (28 oz.) can of diced tomatoes
1 (28 oz.) can of tomato sauce
1 (3o oz. ) can of canned kidney beans, rinsed and strained
2 (15 oz.) cans of cannellini  beans, rinsed and strained
7 cloves of garlic, minced
2 tbsp chili powder
1 tsp paprika
1 tsp dried oregano
1 tsp cayenne pepper
1 tsp ground cumin
1 tsp salt 
1 tsp black pepper

How to make it:

In a large soup pot, heat up the oil. Add in the ground turkey and brown until even. Use your spoon to break up the meat and evenly spread the heat. Stir your chopped onions, cook for about 3-5 minutes, until the onion is clear and tender. 

Once your meat and onions are cooked, add in the canned tomatoes (juice and all), beans and garlic. Stir together. Add in your seasonings... all of them...and bring the soup to a boil. If you don't have enough liquid/broth, you can add in some water. Once it's boiling, reduce the heat to medium low and cover, allowing the soup to simmer for about 30 minutes. 

Ladle into bowls and serve with fresh cut jalapeno and cheddar cheese, and a dollop of sour cream. We also covered a slice of bread with cheddar cheese and jalapenos and broiled it for about 2 minutes, until the cheese was melted... the perfect side. ENJOY! 

The verdict: OM NOM NOM... does that cover it? We loved this soup. E has been waiting all summer for the chance to make chili and this one was well worth the wait. 

What would we do differently: Nothing, except maybe make cornbread to go with it!

XO


Friday, July 19, 2013

Soup #28 / Gazpacho with Scallops and Avocado

28

If you haven't yet read what happened the first time I tried to make this (yesterday), you should. Only then will you understand what gazpacho is NOT supposed to be like. Unless of course, you are a gazpacho connoisseur, in which case, you would already know that, and I hope this one is up to par. I'm super excited about this one because not only was it delicious, but I made it pretty much off the top of my head after reading too many recipes. I just let my hands do the chopping and my taste buds do the thinking. And the end result was, I think, my favorite summer soup yet!

What you will need: 
1/2 cup of chopped English cucumbers
1/2 cup chopped red onion
1/2 cup chopped bell pepper
3 large tomatoes seeded and chopped into 1/2"-1" pieces
2-3 large basil leaves, finely chopped
16 oz of tomato juice 
2 tbsp of sherry vinegar
1 tbs olive oil
1 dash of Siracha or other hot sauce
salt and pepper to taste
1 avocado, sliced/chopped
Scallops, pan seared or grilled (however you like them!)

How to make it:
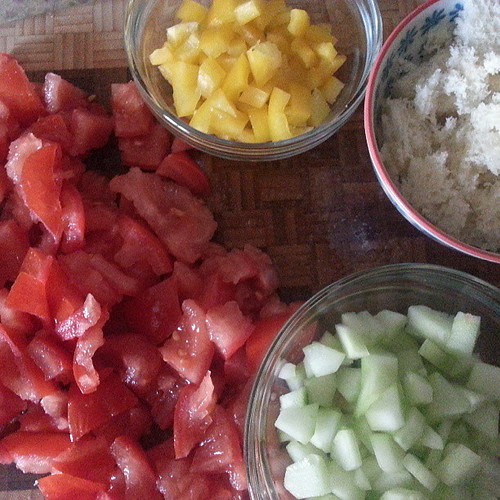
In a medium bowl, stir together the cucumbers, red onion, bell pepper, tomatoes, and basil. Mix together. Add in the olive oil and sherry vinegar, Siracha, and some salt and pepper. Mix everything together until your veggies are completely coated. Cover the bowl with plastic wrap and let it sit in the refrigerator while the flavors marry for a few hours (we left ours over night). 

About an hour before you're ready to serve, add the tomato juice to your veggie bowl. Mix everything up well and chill again until you are ready to serve.  You may need to add a little more salt and pepper to taste. 

Ladle your soup into bowls and top with slices of avocado and then add in the scallops. Enjoy! 

The Verdict: SUCCESS!!! After the epic failure that was the first gazpacho batch, this was bound to be better. But thankfully, it was better than better. It was delicious. The scallops added just enough substance to it without being overly fishy or meaty. The veggies were flavorful and fresh and still crunchy. And while I'm not usually a fan of tomato juice, the broth was the perfect taste of summertime. 

What we would do differently:  MORE SCALLOPS! We only had about 6 fresh scallops that shrunk down a bit after we cooked them, and more would definitely have been awesome. Otherwise, I think I would have added a little bit of garlic, and maybe a splash more of each of the main flavors (sherry, siracha, and basil) before adding in the tomato juice. It was awesome just the way it was!

XO

Thursday, July 18, 2013

Soup Fail.

Gazpacho time. #inthekitchen

If you follow me on Instagram or Twitter, you might already know how this went. This picture went up this morning when I was having a super productive morning. As per usual, I'm a week behind soup-wise, and I have a half-flat of tomatoes that need to get used, so I wanted to make a super awesome gazpacho to really celebrate summer soups in all their glory.

I feel like I need to validate this epic fail by saying that there is something wrong with our blender. I'm not sure what it is, or if we did something wrong to it in some way, but it just doesn't blend right, and I'd like to blame this on the blender. I followed a super recipe from one of my fave cook books, but I knew something was up when my pureed gazpacho was a shade of pink that could be likened to that terrible color hospital basins come in. OK, maybe not that bad, but it was definitely pink, not the ruby red juiciness that graced the pages of the cookbook I was holding. 

Maybe it will look right after it settles, I thought, so I sealed it in Tupperware and into the fridge it went. I ran errands and returned home to get dinner ready. There was going to be gazpacho with seared scallops (nom!) and maybe some shrimp cocktail and grilled zucchini. E and I pulled it out of fridge to find some still-pinkish looking salsa. It was good, don't get me wrong. It was good salsa. It was not soup. Even adding in some more canned tomato with juice in hopes of making it a bit more soup-y didn't stop it from being salsa. It was not meant to be, this gazpacho. 

I dipped some bread in it and ate it anyway, but E had a good point. This was not a soup. It was never going to be a soup. And while it was a very good salsa, it wasn't a recipe that we would necessarily pass on to another person and say, "hey, here's our salsa recipe!" 

To get real with you: I was so disappointed. This is the first soup that failed in first attempt. And I had started the day with dreams of glossy pages with our recipes on them. This was a major bummer. I needed to start over. 

The cool part was, I read through a few more books and looked at recipes, and then... I closed them. I put the books down, went back into the kitchen and got back to it. I decided to do it my own way, marinating the veggies in a mixture of sherry vinegar, olive oil and Siracha, before finishing it all off tomorrow. I'm not sure how this next one will go. It might taste like chunkier salsa because I am definitely NOT blending it. But we will see. Tomorrow will tell. In the mean time I am still dreaming glossy paged dreams and cooking away #inthekitchen. 

XO


Sunday, June 30, 2013

Soup #25/ Shrimp Bisuque

25

E came home from work one day with photos of this recipe out of a magazine (original recipe adapted from Rachael Ray's magazine). He'd seen it and wanted to make it from the very beginning. It took us a few weeks before we caught up with posting enough to head out to the store for a whole new set of ingredients for this soup. It seems to me that the two soups we have made with shrimp so far (the first being our gumbo) have been the two most complicated and time consuming. Not that they were really hard by any standard, but there were many steps and with an unfamiliar ingredient like shrimp, it was a new challenge to learn how to make it just right. Fortunately, we were very pleased with the end result!

What you will need

3 tbsp olive oil
1 lb medium shell-on raw shrimp
4 large sprigs of thyme
1 onion, chopped
1/2 cup of chopped celery
2 tbsp tomato paste
1 cup white wine
2 tbsp long grain rice
1/2 cup heavy cream (heavy whipping cream)
Cayenne pepper
Salt

How to make it:

In a medium to large sauce pan, heat up 2 tbsp of the olive oil on high heat. Add in your shrimp and season with a dash of salt. Stir and cook for about 2-3 minutes until your shrimp are pink and firm. Remove the shrimp from the pot and place them in a medium bowl, allowing the to cool until you can hold them without burning your hand (very important). Peel the shrimp and place the now-clean shrimps in a clean bowl (or the same one) placing the shells back into the pot. Add 8 cups of water and 3 sprigs of thyme. Bring this broth to a boil, cooking for about 20 minutes. Strain the broth into a large measuring glass or bowl, press on the shells to get out any extra broth/flavor.  Now discard the shells. 

Add your onion, celery, and remaining tbsp of olive oil to the (same) pot. Add in some salt and cayenne to add flavor.  Cook this mixture over medium heat until the vegetables are soft (about 5 minutes). Now stir in the tomato paste and the white wine. Bring soup to a boil and cook until the liquid is almost completely evaporated from the mixture. Add in your shrimp, broth and rice, bringing the soup to a simmer over low heat. Stir occasionally as you allow it to all cook for about an hour. 

When the time has come, remove about 6 shrimp from the soup and set them aside. When they are cool, slice them in half lengthwise to garnish your soup later. Now, in a blender, puree the soup in small batches until it is a smooth, desirable consistency. Return the puree to the pot.  Now, add in your heavy cream and bring the soup to a slow simmer on medium heat, adding in extra cayenne and salt to taste.  When the temperature is the desired temperature, ladle into bowls and add in your shrimp halves. Garnish with a sprig of thyme and enjoy!

The verdict

Other than being a long process (maybe we should start soup making earlier than 7:30 at night), it was a success! The soup was flavorful and creamy, just right with a side of crisp garlic bread for dipping. E and I both really enjoyed the flavor, and as always, enjoyed making it together!

What we would do differently:  

I liked mine with a dash more of cayenne, but that was easily remedied in my own bowl to spare E from all the extra spice.  E does feel like it would have been just a dash better with a little bit more cream to thicken it up. It would make it super tasty, more like a chowder, but it was yummy as - is. I'd like to perfect my shrimp cooking skills a bit more before trying this one again though!

XO

Wednesday, June 26, 2013

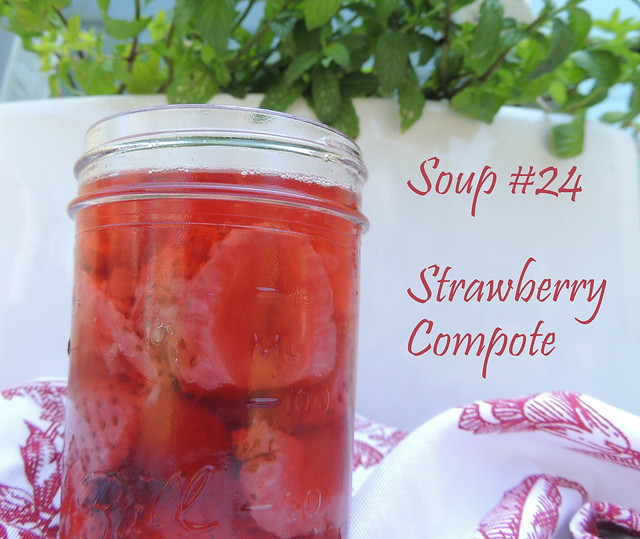
Soup #24/Strawberry Compote

finished

Before we go into the details of this recipe, I wanted to acknowledge that we know, a compote isn't necessarily a soup. And because we know this, and because this ended up being so sweet, we've given it a category all it's own. It's our first dessert soup!  You could totally indulge in a small dish of this with some homemade whipped cream - but read on and we will tell you how we enjoyed. On another note, I think this is hands down, the easiest soup to make. No, really...

What you will need:

3 cups of fresh chopped strawberries (or the ones in your fridge that are getting a little soft and you need to figure out what to do with them before they go bad....those work too)
4 cups of water
2 tbs sugar
1 tbsp lemon juice

How to make it:

Add the strawberries, water, lemon juice, and sugar into a medium sized pan on medium heat. Mix together as it heats up to dissolve the sugar.  

Bring the mixture to a boil and then reduce the heat until it's at a nice simmer. Keep it at a simmer and let cook until the water is a pretty shade of pink and your strawberries are droopy and a dull pink sort of color. 

Remove from heat and allow to cool.  Enjoy!

How we enjoyed it:

Isn't this the best part? Maybe I should make this section a permanent part of each recipe.  We didn't quite know what to do. After it was cool, E and I enjoyed a small little cup of our dessert soup. It was super tasty and smelled like lip gloss, but it was also SUPER sweet. So the next day we decided to mix it up - literally - into some cocktails.   Try about 1 1/2 tbsp of the compote, a shot of tequila and fill the rest up with ginger ale. Rim your glass with some mint sugar (found this brilliant idea here) and it's a delicious mix of flavor on a summer night!  Try it out and share your cocktail recipes here (pretty please!!). 

The verdict: 

As a soup, it's definitely a bit of a stretch, though if I hadn't been so full when I had my small cup, it probably would make the perfect dessert. I still call it a success because it was exactly how we thought it would turn out, and still really yummy. It's not your average soup, but HEY, we're experimenting here.  

What we'd do differently:

Our strawberries were very sweet to begin with. E suggested that maybe we should have used a little less sugar. I would start with maybe 1 tbsp and then add more to taste. And I'd definitely try it on ice cream next time!  

XO

Wednesday, June 12, 2013

Soup #23 / Egg & Lemon Chicken Orzo Soup

23

This is a particular favorite of mine that my mom used to make on occasion, and if I remember right, I think my grandfather used to make this one a lot.  E was having a bout of an upset stomach and, not knowing what to make to help him (we've already made classic chicken noodle), I whipped out my homemade cookbook my mom gave me at my bridal shower. It's a collection of recipes from our family's kitchen, and totally deserves it's own blog post. So I flipped through the pages and stumbled upon this recipe and decided to give it a try!

What you will need:
2 chicken breasts, uncooked
4-5 cloves of garlic, whole
1 cup of orzo pasta
6 egg yolks
juice from 3 lemons
dried mint 

How to make it:
Place your two uncooked chicken breasts in a medium to large soup pot. Fill with about 2 quarts of water. Add in some salt and pepper, and throw in your garlic.  Bring this broth to a boil until the chicken is cooked through.  Turn the flame off, pull out your chicken and set aside. Strain your broth to remove the cloves of garlic and any excess fat or small chicken pieces. 

Put your broth back on the stove and bring to a boil. Add in the cup of orzo and allow it to cook until tender (about 10 minutes). At this time you can add more salt and pepper to your broth to taste (now that the chicken is cooked and your broth is safe to taste!).

On the side, chop up your chicken into bite sized pieces and add them into the soup while your orzo cooks. In a small bowl beat your egg yolks and lemon juice together until blended. 

When your orzo is tender and the chicken is hot again, remove one cup of hot broth and slowly add it to the beaten egg mixture, pouring slowly and mixing continuously to keep it from curdling. 

Turn the flame under the soup off and add another cup of broth to the egg and lemon mixture, using the same technique as above. You want to slowly warm up the egg so it doesn't curdle and leave you with egg-drop soup, but a nice. thickened broth. Now add the egg/lemon/broth mixture into the soup pot, stirring constantly to thicken.  Top with some dried mint to taste and serve immediately. 

The verdict:
Success! Actually I think this is one of my favorite soups yet (although I feel like I say that all the time!). I love the subtlety of the lemon flavor mixed in with the chicken, and the orzo just gives it a little softness. E liked it too and I'd like to think it helped settle his stomach. ;)

What we would do differently:
The addition of the dried mint was E's idea. He liked the flavor of the soup on first taste but it was just lemony-chicken-y tasting. Something was missing. So out came the mint and the taste just popped after that. One thing too is that half way through cooking, once I took the chicken out of the pot, I noticed how much broth was in my pot, and had a small panic attack about whether there should be more broth or not.  I ended up adding in some pre-made broth to make the soup stretch some more, but in retrospect, I don't think it needed it. I think I ended up thinning it out a bit too much, making it a brothier soup than a chunkier one. C'est la vie. It was tasty anyway!

XO

Tuesday, June 11, 2013

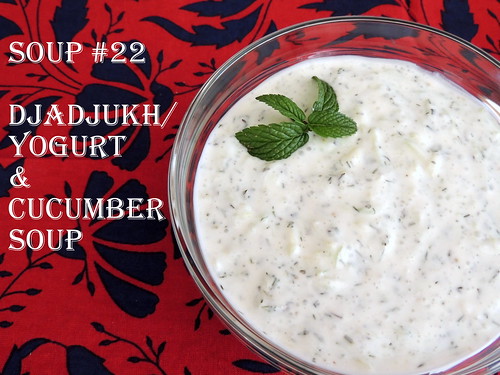
Soup #22 / Djadjukh or Yogurt & Cucumber Soup

22


This soup is one of my absolute favorites when it comes to cold refreshing summer soups. June has been full of overcast mornings that are turning in to hot and humid afternoons. This one is a traditional Armenian dish that is easy to make. It works as a side dish, but I can finish it up as a whole meal!

What you will need: 
1 large container (32 oz) plain yogurt
3 large cucumbers
1 clove of garlic, finely minced or smashed, or garlic powder
~1/8 cup of dried mint
~ 1/8 cup of dried dill
salt & pepper 

How to make it:
Peel the cucumbers and shred them using a grater. Put the shredded cucumber in a strainer and press the excess water out. Put the yogurt in a large bowl and mix in the cucumber. Add in the mint and dill. These are usually "atchkee chop" or by taste, so feel free to add more or less to your liking. When you add it in, you can sort of smoosh it with your hands to make the herbs a bit finer too.  Add salt, pepper and garlic to taste. Stir well and refrigerate, serve on a hot day. Enjoy! 

Seriously, how easy was that? You can store leftovers for up to 4 days in the fridge.

The Verdict:
LOVE LOVE LOVE! Super success. It's been a hot day and E and I are not in the mood to cook or eat a lot. This is the perfect soup. It seriously took about 15 minutes to prep, make, and clean up. It's chilling in the fridge as we speak, but I've tasted it already and I can't wait to dive in. I'm pretty sure that's all I'll be having for dinner. 

What we'd do differently: 
The true determining factor here is E's commentary. I love it, but he's not convinced it's a true soup. "To me Djadjukh is like a topping," he says, which is what truly defines the difference here. I'm used to having this as a whole meal, E is used to having it as a side or a topper. Either way it tastes fabulous! 

XO


Sunday, May 19, 2013

Soup #20 / Summer Squash & Buttermilk Bisque

It must be summer, unofficially, or maybe I'm just getting a little daring with these soups, looking for something different to try out. This soup is fresh and green and perfect as a side for a summertime dinner!


What you need:


  • 2 leeks, tender greens included, chopped
  • 4-6 summer squash, depending on their size (my squash were really large, so I used 4). 
  • 3 cloves of garlic, chopped
  • 3 tbsp oil
  • 4 cups chicken of vegetable stock
  • 1 cup buttermilk
  • 4 tbsp chopped fresh basil
  • 1 tbsp lemon juice
  • 2 tbsp chopped green onions
How to make it:
In a medium soup pot, warm the oil on medium high. Add in the leeks and saute for about 5 minutes until they are bright green and tender. Add in the squash and garlic and cook for another 5-7 minutes until the squash start to brown slightly. Reduce the heat to medium low and add your stock. Cover the pot and allow to cook for 15-20 minutes, until the squash is tender. Remove from heat. 

Using an immersion blender or a regular blender, blend soup contents until smooth. Allow the soup to cool to room temperature, cover and then chill in the refrigerator for about 4 hours. 

When ready to serve, stir in buttermilk, lemon, green onion and 2 tbsp of basil. Flavor with salt and pepper to taste. Stir well and serve, topping with remaining basil for garnish. ENJOY!

The Verdict: 
Success! Ok, in all honesty, when I first took a bite, I didn't really care for it. There was a whole lot going on at the same time. When E took his first taste, he thought it was great. Actually "this one's a winner" is what he said. I, on the other hand was wondering if my taste buds were off, or maybe that I got a bad bite. It did totally grow on me though, the more I tried the more I liked it. It has a very fresh flavor, and I particularly liked the flavor the basil gave to it. Definitely one that needs to be tried again... maybe for lunch tomorrow. 

What We'd Do Differently:
I would have used my blender instead of the immersion blender. There were a lot of squashy-leek fibers that I think the blender would have broken up, but on the other hand, they gave the soup a different texture. E says he liked it just the way it was. I'll be adding extra basil to my next bowl! 

XO

Friday, May 17, 2013

Soup #19 / Tomato & Sweet Pepper Soup

When you throw a Cinco de Mayo bash and have a bunch of left overs, you can get kinda sick of all the rice and beans and carne asada. But when you have a bag of sweet peppers left over, you get to eat yummy salads, and make a soup that's got some bite! We made this one and enjoyed it hot with some toasty paninis for dipping. 


What you need: 
  • 2 tbsp olive oil
  • 1 yellow onion, chopped
  • 6 tomatoes, coarsely chopped
  • about 15-20 sweet peppers (yellow, orange, & red - I used them all!), stemmed and coarsely chopped
  • 3 cloves of garlic, thinly sliced
  • 1/2 of one chipotle chili in adobo sauce
  • 2 cups of chicken or vegetable stock
  • ground pepper
  • yogurt or sour cream to top
  • chopped Italian flat-leaf parsley to top
How to make it:
In a large soup pan on medium heat, warm the olive oil and add in your onions. Saute until they are soft and turning clear (about 4 minutes). Turn the heat to medium -low and add in your tomatoes, peppers, garlic, the 1/2 chile in adobo, and the stock. Cover the pan partially and allow to cook for about 20 minutes, until the veggies are softened. Remove the soup from heat. 

Using an immersion blender or a regular blender, blend the soup until it's smooth. Using a ladle, spoon the soup into a medium mesh strainer over a serving dish. Use a spoon or the back of the ladle to push through the juices, leaving behind the pulp. You can discard the pulp, ORRR.... if you have some tortilla chips, scoop up some in a corn chip shell and give it a try, it's yummy! 

The original recipe from Williams-Sonoma's "Soup" suggested chilling the soup for several hours and serving it cold with a dollop of yogurt or sour cream on top. We decided to have it hot, topped with yogurt and parsley. 

The Verdict:
Success! I loved it! It was hot and sweet and smokey. Just that 1/2 chipotle chili adds quite the flavor and I liked it! We actually did try this soup chilled, and while E thought I wouldn't like it because it was similar to V8 (which I so don't like), I actually thought it was pretty good, but I did prefer it hot. It was VERY peppery.  I tweeked the original recipe and it may have been a bit more on the pepper side than the tomato side, but it was a winner in my book!

What We'd Do Differently:
I think I'd like to try it with a little bit more tomato, just to pull a bit more of that flavor into it, but really, it was great just the way it was. As you can see we topped it with yogurt, which helped tame the flavor a bit, giving each bite the right amount of flavor!

XO
P.S. I have to give major props to E, my hubby and art direct for the awesome yogurt garnish on this soup!

Thursday, May 16, 2013

Soup #18/ Chilled Watermelon Mint Soup

It's been feeling a lot like summer around here lately, which can make the thought of soup pretty...well...not like something you'd want to be eating or making when it's 90 degrees outside. And while I've been having a hard time keeping up, the weather hasn't changed the fact that we love soup. It just changes the game up a little bit. So with that, here's our first official summer soup. 


What you need:

  • About 9 cups of red seedless watermelon
  • 2 tablespoons of fresh chopped mint
  • 1 tbsp sugar
  • 2 tbsp fresh lemon juice
  • 1 cup of a light, sweet wine like a Reisling or a Moscato (we used a bubbly Moscato and it was yummy!)
  • 1 tsp chopped ginger
  • about 1 cup crumbled feta cheese
How to make it:
Remove about 1 cup of watermelon from the rest and place it in a medium size bowl. Mix in your sugar and fresh mint and give it a stir. Now set it aside. Add the remaining 8 cups of watermelon, lemon juice, wine, and ginger into the blender and blend it until smooth. If your blender is on the smaller side (like ours), it's probably better to do this in two batches. We stuffed our blender full and then because of the bubbly Moscato, it got a little bit all over the place. However you do it, blend until smooth. 

Let this blend sit for a half hour. Strain your soup and divide into bowls. Take your watermelon-sugar-mint bowl that you set aside and scoop equal amounts into each bowl. Top with a spoon of feta cheese and enjoy!

The Verdict: 
Success! It definitely was different. This is the first soup that wasn't cooked in anyway. I also skipped the "strain soup" detail in the recipe and so there was just a massive essence of pureed watermelon. But it was a super hot day, and it was so refreshing to have that yummy watermelon taste.  This is definitely a soup that can be substituted for a whole meal, maybe as an appetizer, but really, it was good as a mid afternoon snack.  Another plus: I discovered that watermelon and mint is an absolutely amazingly delicious combination, and now that I have my own mint plant, I think I might be eating this more often! 

What We'd Do Differently:
Well, clearly, straining it would be a first. I'd also add a bit more ginger, I really couldn't taste it at all. I also loved the watermelon mint sugar mixture, and think that some of that (or more sugar/mint) could have been added to the blended mix. The weird thing is you don't really want to eat it like a soup, but drink it like a juice... which is still pretty darn delicious!

XO

p.s. Original recipe is from here.

Thursday, May 2, 2013

Project Decorate: Kitchen Art


TA DA!  I don't have any pictures to lead into this one of my progress and the days and days of converting  my kitchen into an art studio with paint and brushes everywhere, mostly just because it was all a big mess. But I've been thinking about this painting for a long time and I am so excited that I've finally finished and completed it!

If you follow me on Instagram, I posted a picture not too long ago of a sketch that turned out something like this... impressions of carrots, peas, and tomatoes. I really wanted to make it into a bigger picture and was thrilled when E suggested the exact same thing before I could even say it! I went out and bought some canvas (this one is small, only 18x24) and had to find my paints. Turns out they were still at my mom's so the project was delayed until I could go over to visit again and bring home my box of paints from 7 + years ago. Good thing acrylic doesn't go bad!

So I started working and first started just painting the carrots, on the white background. I soon realized that filling the background in later would be a big problem. So I mixed up the red/brown color and covered everything up for a do-over. And I am so happy I did. Sometimes all you need is a clean slate. The carrots and peas came out better than ever and I love the contrast of the bright colors against the dark backgrounds. My technique is lots of paint... I love the texture that it creates on the canvas. Of course, it was a little harder to achieve this on the detailed little peas, but I worked slowly and practiced patience and I love how it all turned out. 

My first full painting in years, and my first painting signed with my new initials. AND I think it might be the first painting in a series of paintings. We have this one hanging on a big blank wall in the kitchen (it's not blue...even though this picture makes it look that way!) and it just needs something up there with it. I have two smaller 9x12 canvases that might have to join it on either side. But for now, I am loving my kitchen art. 

Another project down!

XO

Sunday, April 28, 2013

Soup #17/ Asian Sesame Ramen


This week's soup is a belated birthday soup for my dear Pops! We celebrated his big day last month, but with schedules and work and all that good stuff, E and I have been saying "we've got to get him a soup!" for the last month. Luckily this week there was a gap in my day and I was able to take this over to the TownsBurr Gallery (my dad and step mom's gallery - check it out!) and the three of us got to celebrate all over again!  

His birthday soup request was "something broth-y with chicken and vegetables and noodles."  It sounds like the options are sort of limited really, but as this project has shown me, broth, chicken, vegetables, and noodles are only a starting point for a whole bunch of amazing tasting soups. So with that request I got to thinking and decided on an Asian-style ramen. Growing up my dad and I had a ramen place we loved to go to. The place isn't there anymore, but I thought it would be a nice homage to the past to cook up a ramen for his birthday!

What you will need: 
  • 6 cups chicken broth
  • 2 tbs soy sauce
  • 1 tsp sesame oil
  • 2 chicken breasts
  • about 1 tsp finely chopped fresh ginger
  • 3-4 heads of baby bok choy
  • a bunch of green onion, chopped on a slant (just so they look pretty!)
  • about a cup of snap peas, halved on a slant (again, the pretty factor)
  • 1 package of dried ramen noodles
How to make it:

First off, get your  chicken ready. I used frozen chicken breasts, cleaned them and chopped them into about 2-3 inch pieces.   Place the chicken in a large frying pan and add your chopped fresh ginger.  Turn onto medium heat and cover.  You're pretty much just going to poach the chicken. Every few minutes, check on the chicken and turn till all sides are white, and it appears to be mostly cooked through. It will cook more in the soup later on. Remove from heat and set aside. 

In a large soup pot, add your chicken broth and turn heat to medium high. As it's warming up, add in your soy sauce and sesame oil. You may want to use these measurements as a guideline and add more or less to taste. I'll talk about it more later, but I think I was a little too cautious with this soy sauce. Bring the broth to a boil and add in your green onion so the flavors can marry a bit.  Add in the chicken with the bits of ginger. Allow the soup to simmer for about 5 minutes. 

Now you can add in your ramen noodles. They don't take long to cook so keep a close eye on them. Once they are almost ready or al-dente (to use an Italian saying for an Asian soup), add in your baby bok choy and snap peas so they don't get too wilty and soggy. 

When your veggies have turned a bright green and your ramen is soft, and your chicken is cooked through, you're ready to dish it up and serve!

The verdict: 
A successful birthday soup! Though I do have to say we all came to the conclusion that it needed a little bit more flavor.  But despite that, it did come out pretty good. It was a light and tasty soup that left you feeling healthy and satisfied. And the birthday boy was happy too, so it was a definite success!

What we'd do differently: 
To fix the flavor issue, I think I would cook the chicken with a little more seasoning, maybe steam it with some soy sauce. That would have helped. And maybe a dash more of ginger and a little somethin'-somethin' (more soy sauce? maybe some miso flavoring?) in the broth to perk up the taste of the sesame, it would be juuuuuust right!

ENJOY!

XO

Monday, April 22, 2013

Soup #16 / Tahn Abour / Yogurt Soup


I've been meaning to make this soup for a while as it's definitely one of my favorites. Tahn Abour literally means "Yogurt soup" is an Armenian dish that's buttery, yogurt-y, minty, and filling, all in the most amazing way - and it's good hot or cold! What could be better?

What you will need: 
1 cup wheat (pelted and hulled) or bulgur
8 cups chicken broth
2 cups of plain yogurt
1/2 cup butter
1/2 large yellow onion, chopped
1/3 cup parsley, chopped
1/3 cup mint, chopped (dried mint is fine!)
Salt and Pepper to taste

How to make it: 

In a large sauce pan, add your wheat and broth and on a medium low heat, cook your wheat for one hour until the wheat is soft and fluffy. When the wheat is cooked, take a medium non-stick pan and melt your butter and add the chopped onion. Saute until your onion is translucent - a few minutes. Add this to the broth and wheat. Now add in your parsley, mint, and some salt and pepper to taste.  Cook this for about 45 minutes longer, letting the flavors marry.  

Now it's time to add the yogurt, but you can't add it straight in or it will curdle the yogurt (yuck!).  So you want to temper the yogurt. In a small mixing bowl, add your two cups of yogurt. Then spoon in several spoon fulls of the hot soup, whisking quickly as you go. This will warm the yogurt and get it ready to be added to the hot soup. When it's room temperature, stir it into the soup gradually and continue to stir until it's all mixed in well. Simmer for another 3-5 minutes. 

Serve the soup immediately, or you can cool it and serve cold. 

The Verdict: YUM!  Success! Honestly, I was a little worried. I've never made Tahn Abour on my own before, and I had these amazing memories of how rich and flavorful it was. As I was cooking the wheat and tasting it here and there and I was like "really? this is what it tastes like?!" I was convinced I was doing something wrong. But I kept on cooking and following my mom's recipe, and once those buttery onions and all the spices hit the soup, I could taste the closeness... and then when I added the yogurt, it all came together in it's tasty goodness! E approved as well with some remarkable compliments. It's always good when you make a traditional dish and it lives up to expectations!

What I would do differently: I adore this soup and all the exquisite flavor. But with all that goodness comes lots of...calories. If I were making this again, I would try to maybe use 1/2 the butter, and maybe some low-fat or fat free yogurt. Also, all the extra calories made our soup very thick when cold... I think that a low-fat/non-fat yogurt would make this soup a little easier to enjoy cold too (which is half the fun of having this as a leftover!).

Enjoy!

XO