Last weekend my sweet sister-in-law hosted an amazingly beautiful baby shower for me. It was, as some of my friends said, "a Pinterest dream come true!..." and she doesn't even have an account! Full of blue tulle and baby blocks, and choc-full of a picturesque baby blue candy bar - even blue punch, she totally aced a pin-worthy, beautiful shower.
So what's a girl like me to do to thank her for all her hard work? I am always stuck when it comes to thank you gifts for things like this. What can you possibly get that makes someone smile and feel appreciated for everything they have done? I was texting back and forth with my mom about it (as I usually do when I need advice, or just a sounding board, or...whenever) and she came up with a "survival kit" idea. Not only am I going to be a new-mommy, but my sister-in-law is going to be a new auntie. Why not put together a bag full of fun, useful, quirky, things she might need?
And the light bulb turned on. It took a lot of back and forth about what would actually go into the kit, but in the end it turned out to be a big success. I started out with a blue and white beach tote from Forever 21 (color scheme inspired by my little man), and then thought about the things that a new auntie babysitting for the first time might need... and then some funny additives for kicks! After a trip to a few stores, my bag was almost complete...it just needed a little explanation. I was so excited to figure out my new Cricut (I got it for my birthday in May and hadn't had a chance to figure it out yet). With some trouble shooting I learned how to make a gift tag in the shape of a onesie, how to cut it in different sizes, and suddenly my bag looked way legit.
Here's a few of the items I put inside:
A bib: to avoid changing his clothes after every feeding...
Burp cloths: to keep your shirts spit-up free
Honest Company Diapers: for changing those stinky diapers - in style!
Ear plugs: to drown out those high pitched cries (not really of course!).
Pacifiers: for when you need a mute button (really...of course!).
Hand Sanitizer: so you can stay baby-germ free!
Also included in the bag:
-A travel pack of wipes: for diaper changes on the go
-A tub of bath salts: for scrubbing off spit-up and drool
-A bottle of body oil: for hydrating your skin after playing in the mud
-An eye mask: for getting some shut eye (after he's gone home of course!)
-Two packs of face masks: to relax after a long day of baby sitting
Here's the full package deal after it was all complete!
I'm happy to say she thought it was super cute and that she loved it! I tried to incorporate things that she could have on hand for the baby (sort of like her own personal diaper bag), and then a few things she could use for herself, and some with just a bit of humor. I did want to add something a little more special for her so I included a gift certificate for a massage at a day spa...just a little pampering for her to enjoy.
What do you all think? I loved making this and had a lot of positive feedback. Would you gift something like this to someone? I am thinking of creating a few more and putting them up for sale on Etsy. I'm thinking of having bag options for bachelorette parties, bridal showers, babies, maybe even for new dads. I also thought of adding in a bottle of wine and some wine glasses, that's definitely an option. And the bag can be customized after purchase with something special like jewelry or a gift card, like I added. I can also include a few extra tags for you to do your own personalizing, or leave them blank for you to add your words the way you want them. I'm definitely open to feedback and suggestions though! What do you think? Send me your feedback in the comments, I'd love to hear it!
XO
Showing posts with label DIY. Show all posts
Sunday, July 20, 2014
Friday, June 20, 2014
Baby's Second Blanket
Oh how I love a good craft project. Right after we had our first ultrasound appointment at 8 weeks I headed off to Joann's fabric store to get started on a blanket. It took several months and a lot of troubleshooting, but I completed baby's first blanket, and my first homemade quilt, and you can see it here. It was super fun (and often very stressful) but I love the end result and I can definitely see us using it all over the house and even on picnics and camping trips.
One thing I didn't know at the time was whether our baby was a boy or a girl, so I tried to pick some gender neutral colors and patterns. With the exception of the purple stripe and all the floral prints, I think our little guy will be OK with it, and if it's not his favorite blanket, it will still be super special. Even after we found out we were having a boy we had to keep it under wraps until our gender reveal party with our parents, and it just didn't seem right to start a baby boy project until I could share the news.
So literally RIGHT AFTER our gender reveal my mom, mother-in-law, and sister-in-law decided we needed to ditch the guys for a bit and head off to get a new craft project started. Back to Joann's where I found the CUTEST, fluffiest yarn in blues and creams. PERFECT! I wasn't too sure what kind of blanket I was going to make but I knew it was going to be just for him.
And this was the end result! I'm thrilled with how it turned out. I did it in the same stitching I used for my friend's baby's blanket, but the thickness of the yarn gave it a whole new look and feel. It's ultra soft and fluffy, and I can definitely see us using this to snuggle with while breast feeding or just rocking on our chair (double points that it matches the chair!).
Can you feel the fluff? I'm so looking forward to snuggling with my little guy under this blanket! Just 10 more weeks!
XO
One thing I didn't know at the time was whether our baby was a boy or a girl, so I tried to pick some gender neutral colors and patterns. With the exception of the purple stripe and all the floral prints, I think our little guy will be OK with it, and if it's not his favorite blanket, it will still be super special. Even after we found out we were having a boy we had to keep it under wraps until our gender reveal party with our parents, and it just didn't seem right to start a baby boy project until I could share the news.
So literally RIGHT AFTER our gender reveal my mom, mother-in-law, and sister-in-law decided we needed to ditch the guys for a bit and head off to get a new craft project started. Back to Joann's where I found the CUTEST, fluffiest yarn in blues and creams. PERFECT! I wasn't too sure what kind of blanket I was going to make but I knew it was going to be just for him.
And this was the end result! I'm thrilled with how it turned out. I did it in the same stitching I used for my friend's baby's blanket, but the thickness of the yarn gave it a whole new look and feel. It's ultra soft and fluffy, and I can definitely see us using this to snuggle with while breast feeding or just rocking on our chair (double points that it matches the chair!).
Can you feel the fluff? I'm so looking forward to snuggling with my little guy under this blanket! Just 10 more weeks!
XO
Monday, March 31, 2014
Baby's First Blanket
A few weeks back I posted here about my latest sewing adventure. It's been a whirlwind of thread and needles, and learning of course, but it's finally finished in all it's glory (well, my glory, since I'm super thrilled about it!).
I can't believe it's finally finished. The basic idea for this quilt pattern and method came from Elise Blaha Cripe's Get Quilty E-Course that I purchased last October. While I made the table runner to start, this blanket was really the reason I bought the course. And while I really couldn't say anything in my last post about sewing it, this blanket was made 100% with baby in mind.
Now, since we don't know yet if we're expecting a baby boy or a baby girl, I *tried* to be gender neutral in the color selection. Some of the patterns are a bit more floral and "girly" but hey, whatevs. My intention with this blanket was not to make a "bed quilt" (SAFE SLEEP people - babies shouldn't sleep with blankets over them!). What I wanted this quilt to be is really, well, an "adventure quilt." I want it to be something we can lay out on the floor to play on, something we can take to the back yard, or the park and play on. Something to build forts with and to hide under, and then cuddle up in bed with a good book and our quilt. Sure, newborn baby isn't going to care much about it, but this blanket will be with us for many years.
I followed the E-Course for the majority of the steps to make this quilt with a few exceptions. After having a lot of trouble with the binding on the table runner, I did some research and decided to invest in a "walking foot" for my Singer sewing machine. This foot allows the layers of fabric to feed through the machine together to avoid pulling of the material, and uneven fabric in the end. I also read up more on bias tape because I didn't feel like I cut it well for the table runner. I found this awesome tutorial on you-tube on making a continuous bias tape and made it happen. It took a few tries - the video has you cutting 2.5" bias tape, which I found to be too narrow for my imperfect stitching technique. So I tried again with 3.5" lines and loved the way it turned out (though with 3.5" you need more than 1/2 yard, probably about 3/4).
With the walking foot I still had some issues with my binding, but much of that stems from my own impatience. I'm really the only one staring at the flaws on the blanket, and I'm learning to love them. To be really cheesy about it, I look at this blanket as a metaphor for what I imagine parenting to be like in the first few months: you try different techniques, you mess up, you fix it, you try your best, you get impatient, you want to cry, but you put your blood sweat and tears into it (literally because I cut my finger on a pin...) and in the end it may not be perfect but you made it with all your love and baby's going to love it because of that.
I can't wait for this quilt to become a part of our daily routine somewhere down the line. It's already full of memories of this pregnancy for me, and I can't wait for our little family to grow and keep making memories with it.
XO
I can't believe it's finally finished. The basic idea for this quilt pattern and method came from Elise Blaha Cripe's Get Quilty E-Course that I purchased last October. While I made the table runner to start, this blanket was really the reason I bought the course. And while I really couldn't say anything in my last post about sewing it, this blanket was made 100% with baby in mind.
Now, since we don't know yet if we're expecting a baby boy or a baby girl, I *tried* to be gender neutral in the color selection. Some of the patterns are a bit more floral and "girly" but hey, whatevs. My intention with this blanket was not to make a "bed quilt" (SAFE SLEEP people - babies shouldn't sleep with blankets over them!). What I wanted this quilt to be is really, well, an "adventure quilt." I want it to be something we can lay out on the floor to play on, something we can take to the back yard, or the park and play on. Something to build forts with and to hide under, and then cuddle up in bed with a good book and our quilt. Sure, newborn baby isn't going to care much about it, but this blanket will be with us for many years.
I followed the E-Course for the majority of the steps to make this quilt with a few exceptions. After having a lot of trouble with the binding on the table runner, I did some research and decided to invest in a "walking foot" for my Singer sewing machine. This foot allows the layers of fabric to feed through the machine together to avoid pulling of the material, and uneven fabric in the end. I also read up more on bias tape because I didn't feel like I cut it well for the table runner. I found this awesome tutorial on you-tube on making a continuous bias tape and made it happen. It took a few tries - the video has you cutting 2.5" bias tape, which I found to be too narrow for my imperfect stitching technique. So I tried again with 3.5" lines and loved the way it turned out (though with 3.5" you need more than 1/2 yard, probably about 3/4).
With the walking foot I still had some issues with my binding, but much of that stems from my own impatience. I'm really the only one staring at the flaws on the blanket, and I'm learning to love them. To be really cheesy about it, I look at this blanket as a metaphor for what I imagine parenting to be like in the first few months: you try different techniques, you mess up, you fix it, you try your best, you get impatient, you want to cry, but you put your blood sweat and tears into it (literally because I cut my finger on a pin...) and in the end it may not be perfect but you made it with all your love and baby's going to love it because of that.
I can't wait for this quilt to become a part of our daily routine somewhere down the line. It's already full of memories of this pregnancy for me, and I can't wait for our little family to grow and keep making memories with it.
XO
Thursday, February 13, 2014
A blanket for a friend
On the subject of blankets, I wanted to share another project with you, now that I can! My dear sweet friend is getting ready to have her baby next month! YAY! It's been so much fun to share her pregnancy adventure with her. We've been taking biweekly photos of her growing baby belly with a fruit to indicate what size the baby is that week. It's hard to believe that she's going to be a mommy in just a few weeks - the time has flown by so quickly.
I wanted to make something extra special for her and the baby for a few reasons 1) she's one of my best friends and I think handmade gifts are like a labor of love (no pun intended), 2) I thought this would be different from the other blankets she'd definitely be getting, and 3) I wanted a new project to work on (duh!).
It actually all started on Thanksgiving, after dinner, when we were all sitting around. I had bought the yarn, but didn't know what to make. My mom was working on a blanket she was crocheting for our Church's blanket drive and so she started me on this checkered afgan type blanket. I worked on it on and off for about 3 months, without telling my friend at all (which was hard since I was really excited about it). That also meant that photos I posted on Instagram had to be generic (and black and white) to not give it away.
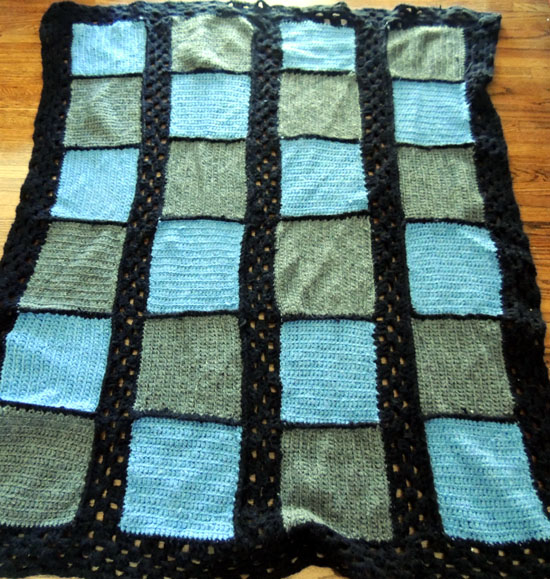
But after 3 months, I finished. I didn't blow the secret, and I think she was happy with it. I used a baby-grade yarn that had blue, green, white, and gray, and then to add some contrast, I added a few rows of gray to the border, just to change things up a bit. The best part is the baby yarn is super soft. I hope her baby likes to cuddle up with it and if not, well, it makes a pretty decorative crib-hanging blanket too!
XO
I wanted to make something extra special for her and the baby for a few reasons 1) she's one of my best friends and I think handmade gifts are like a labor of love (no pun intended), 2) I thought this would be different from the other blankets she'd definitely be getting, and 3) I wanted a new project to work on (duh!).
It actually all started on Thanksgiving, after dinner, when we were all sitting around. I had bought the yarn, but didn't know what to make. My mom was working on a blanket she was crocheting for our Church's blanket drive and so she started me on this checkered afgan type blanket. I worked on it on and off for about 3 months, without telling my friend at all (which was hard since I was really excited about it). That also meant that photos I posted on Instagram had to be generic (and black and white) to not give it away.
But after 3 months, I finished. I didn't blow the secret, and I think she was happy with it. I used a baby-grade yarn that had blue, green, white, and gray, and then to add some contrast, I added a few rows of gray to the border, just to change things up a bit. The best part is the baby yarn is super soft. I hope her baby likes to cuddle up with it and if not, well, it makes a pretty decorative crib-hanging blanket too!
XO
Wednesday, February 12, 2014
Taking sewing to the next level
I'm home sick today, and though I am sipping my tea and getting some rest, I don't like sitting in bed all day. I feel like it makes me worse. So I thought I'd take my tea into the office and share a little bit of what's going on with me, here with you.
I know I've been a little silent here on the blog lately, but we've been busy. 2014 is definitely going to be an adventure of a year, and we'll keep you posted throughout. But on my downtime, I've been sewing. Quilting to be exact. Some of you might remember the quilted table runner I made in fall (you can see it in the picture of our buffet table below), and if you follow me on Instagram (@lovewellcrafted), you might have seen some photos already. Last year I took Elise Blaha-Cripe's Get Quilty E-Course and instantly loved how easy it was to teach myself how to sew something that always seemed so complicated: a quilt.
A bit on my sewing past: For my 17th birthday my mom bought me a sewing machine. And while I was so in love with the idea of sewing, my mind always wandered and sitting down to sew my clothes wasn't a priority. I'm pretty sure we still have the fabric and pattern to make the skirt I wanted to make (I need to dig that up and finally make it!). Needless to say, my mom probably used it more than I did, with the exception of our Halloween costumes (in 2009? 10?) when E and I went as Fred and Wilma Flintstone. My mom walked me through the stitching of the straight seems up the sides of the felt. They came our pretty good (mostly thanks to her) and then it went back in to the corner, only to emerge again when I moved and (for some reason) insisted on taking it with me.
Thankfully I did because somehow, in my brain, marriage = a time to become domestic. I became the un-domestic goddess and decided to make our first Christmas Stockings. The concept seemed easy enough, and while it really should have been pretty simple, my machine kept jamming, and I kept re-threading and re-turning knobs that I didn't understand until they were finally finished. Considering I was basically sewing blindly, they came out a little small, but over all pretty decent.
The machine got put away again until fall and the Get Quilty E-Course. I spent hours at Joann's picking out fabric and I did what I should have done with the stockings - I downloaded the manual for my machine! Suddenly it all started to make sense! That knob I had been turning wasn't for the thread tension it was for the width of the stitches. And my thread was breaking because I was using the wrong bobbins! Oh and my needle... yeah I put it in the machine wrong.
So a change of the needle, finding the right bobbins, figuring out the right settings, that all took a little bit of practice, but it started to make sense, and it all started coming together. Before I knew it I had a table runner, and while in my picky, judge-y eyes it is far from perfect, those little imperfections are proof of what the whole process really was...a learning experience.
I wanted to try again, with something a bit bigger, something we could use around the house... another blanket! So another few hours were spent at Joann's picking out the right patterns and colors. I decided to go with the e-course's "ombre" quilt, but in my own color scheme. Something fun and out-doorsy, as I thought the blanket would be good for picnics and other adventures.
I know I've been a little silent here on the blog lately, but we've been busy. 2014 is definitely going to be an adventure of a year, and we'll keep you posted throughout. But on my downtime, I've been sewing. Quilting to be exact. Some of you might remember the quilted table runner I made in fall (you can see it in the picture of our buffet table below), and if you follow me on Instagram (@lovewellcrafted), you might have seen some photos already. Last year I took Elise Blaha-Cripe's Get Quilty E-Course and instantly loved how easy it was to teach myself how to sew something that always seemed so complicated: a quilt.
A bit on my sewing past: For my 17th birthday my mom bought me a sewing machine. And while I was so in love with the idea of sewing, my mind always wandered and sitting down to sew my clothes wasn't a priority. I'm pretty sure we still have the fabric and pattern to make the skirt I wanted to make (I need to dig that up and finally make it!). Needless to say, my mom probably used it more than I did, with the exception of our Halloween costumes (in 2009? 10?) when E and I went as Fred and Wilma Flintstone. My mom walked me through the stitching of the straight seems up the sides of the felt. They came our pretty good (mostly thanks to her) and then it went back in to the corner, only to emerge again when I moved and (for some reason) insisted on taking it with me.
Thankfully I did because somehow, in my brain, marriage = a time to become domestic. I became the un-domestic goddess and decided to make our first Christmas Stockings. The concept seemed easy enough, and while it really should have been pretty simple, my machine kept jamming, and I kept re-threading and re-turning knobs that I didn't understand until they were finally finished. Considering I was basically sewing blindly, they came out a little small, but over all pretty decent.
The machine got put away again until fall and the Get Quilty E-Course. I spent hours at Joann's picking out fabric and I did what I should have done with the stockings - I downloaded the manual for my machine! Suddenly it all started to make sense! That knob I had been turning wasn't for the thread tension it was for the width of the stitches. And my thread was breaking because I was using the wrong bobbins! Oh and my needle... yeah I put it in the machine wrong.
So a change of the needle, finding the right bobbins, figuring out the right settings, that all took a little bit of practice, but it started to make sense, and it all started coming together. Before I knew it I had a table runner, and while in my picky, judge-y eyes it is far from perfect, those little imperfections are proof of what the whole process really was...a learning experience.
I wanted to try again, with something a bit bigger, something we could use around the house... another blanket! So another few hours were spent at Joann's picking out the right patterns and colors. I decided to go with the e-course's "ombre" quilt, but in my own color scheme. Something fun and out-doorsy, as I thought the blanket would be good for picnics and other adventures.
I decided on five color schemes: light gray, deep purple, royal blue, light blue, and light green. The backing is light gray with white polka dots and the edging will be white with gray cross hatching. Then I had to cut the rectangles. This is the only reason I would have to space out the quilts I make in my life... the cutting is ridiculously tedious and time consuming. Not my thing.
But I finally finished that and got my rectangles all (somewhat) equal (or so I thought), and laid them out in the pattern I wanted.
Then I stacked them back up and got to sewing. All the rectangles got stitched into color rows. When I lined them up again, I found that the light green, light blue, and royal blue rows all had perfectly lined up rectangles, but the purple and gray rows were a bit wider. A little disappointing after all the time I spent cutting them exactly, but really, whatever. I still think it's going to look pretty darn neat!
The next step is to stitch all the rows together, then attach the batting and the backing, then sew those together, then finally (the part I'm most scared for), sewing on the edging! But... like I said, it's all a learning process, and one that shells out some pretty fun end results, even if they aren't perfect!
So that's my sewing story. I'm still working on it, and it will take a while with everything else going on, but it's a fun release at the end of the day (or while E is playing Call of Duty or watching Walking Dead - plus side - the machine drowns out the sound of zombies!). I'll post more progress as it comes, but for more updates, you can follow me on Instagram @lovewellcrafted and follow the hashtag #soanisews for any pics I snap along the way! For now, I'm going back to bed with my box of tissues. Good night!
XO
Wednesday, May 15, 2013
The Sketchbook Project: book binding
This year, my mom and I are participating the The Sketchbook Project for
the second time. This time, as a part of the "1703 miles and back
tour." One of the big challenges we faced last time (other than time
constraints!) was that we had the flimsy paper that came with the
sketchbook and it really wasn't conducive to the water based art we both
wanted to include (or, in my case, coffee based). AFTER turning in the
project with wrinkled pages, we realized that we could have, and should
have, rebound the book with paper that would have actually worked for
us.

We actually sort of signed up for this project as a sort of do-over,
knowing that we would get it bound with better paper and then be able to
create better art and with more time to complete it! So I followed
these instructions, with some modifications for the measurements and the
number of signatures (the instructions were not 100% correct), and
after lots and lots of paper cutting, and actually doing the stitching
of the pages twice, just to make sure it was extra sturdy, I have my
finished product!
I love that it turned out so official looking. I've actually purchased sketchbooks that are bound this way and it was super fun to know that I could get it done myself. I should mention though, that it was a very long process, especially given the flaws in the instructions, and the fact that I was trying to work little bits at a time without a clue as to what I was really doing. I'm not sure that I will quit my day job and become a book binder any time soon, but I think I've got the hang of it now, and maybe I'll try it again sometime
Monday, April 29, 2013
Project Decorate: The Mantle
You might have seen this picture in last week's post about some around-the-house decorating we've been doing as we prepare to have our family over to the house and start settling in. A few weeks ago I bought an "E" and an "A" in a pretty green color. I'd wanted and ampersand to go in the middle, but had no such luck. At least not until a week or so later at another store when I found this black ampersand from the same collection. All was well with the world, except the color. We don't have a lot of black in the living room and it's just too harsh of a color to have in the middle of the mantle right now.
But I bought it anyway, knowing that I could do something to it. But mixing the same green color was not an option. Acrylic paint is what I have and what I planned to use, but if there is anything that my 2D design class taught me it's that it's nearly impossible to mix exact matching colors with acrylic without wanting to scratch your eyes out. It's infuriating and a home DIY project should not be that.
It took some planning and a little bit of back and forth, but I decided on a sort of neutral peachy-brown color. Something that goes well with the green letters, but also with the flow and colors of the room. Turns out, it worked!
The mantle is still a work in progress, we need something with some height, and definitely something to fill that big blank space above it (maybe a wedding picture on canvas?) but for now, I'm super happy with how my letter's came out...and especially my ampersand.
Can't wait to share some more exciting decorating projects!
XO
Friday, April 26, 2013
Project Decorate in underway!
Not sure where all the time is going, but E and I celebrated our 6 month wedding anniversary this month. Can you believe it? I can't. We're in a super good place and finally getting settled into our lives together. It's helped so much that I am working during the day time now. We get to spend our evening together despite our work schedules. We don't have those days where we don't see each other at all because things just don't line up. And it's Spring. The garden is coming along (post coming soon...) and now we are prepping for our first "gathering" at our house! Ok, I guess "gathering" makes it sound like people are coming over for some creepy pagan ritual or something. Nothing of the sort, but our family and some friends are coming by next month and it's the first time we'll really get to show off our house and what we've done to it.
So now we've got to do something to it! So begins "Project Decorate." I'm not sure how far we will get before people come over, but at least now we're officially starting. And I plan on getting some of it posted here. The picture above is just a sneak at an ampersand I found at Marshall's the other day. I picked up an "E" and an "A" last month, but they are green, and this is clearly black. Just a bit of gesso and a coat of paint and We have a cute mantel piece in our living room.
We've got wall art in the laundry room, an almost finished painting for the kitchen and one to start for the living room. We've cleared off the couch in the office and have a cozy work area that I'm sitting on right now! New table cloths for spring, and hopefully some shopping for a real kitchen table and some living room pieces will be happening soon.
It's all starting to come together and I can't wait to share it with you soon!
XO
Tuesday, April 9, 2013
Getting around to decorating...
So we've been married almost 6 months now (WHAT!?) and we've been living in our home since the wedding night. While we've finally got some awesome couches, coffee table and an area rug in the living room, and the kitchen is pretty much complete (sans some wall decor), and we've established functional parts of the house, some with more decoration than others, we still really need to step it up decor-wise and maybe finally put up some pictures and wall art.
We're getting ready to have some of our family and friends over to our house (finally) and I am hoping this forces us to get around to putting stuff up on the walls and maybe looking for some more furniture the fit our house needs. So today, despite still feeling blah with a sore throat and a cloudy head, I'm going to try to straighten things up a bit. But before I get started with that, I am enjoying my cup of coffee and flipping through Pinterest and Etsy for some decorating ideas. Here's what I came across so far...
We've been looking for the right wine rack, and I love that this displays the wine AND the wine glasses, which means we wouldn't have to keep our glasses up on the very top shelf in the kitchen. Plus I think this is a simple enough design that E might even be able to make it with the leftover wood from the previous flooring.
I would really love to incorporate shelves that can house books, pictures, and maybe some trinkets or plants. I love that these are different and funky, but also uniform so they don't look too weird.
These shelves are a simple white and I think they'd work well in the living room. Our walls are almost a light mocha-cream color, so the white stands out in a cool way. I think that having simple shelves allows for you to add more to the shelf without it getting too crowded.
We're getting ready to have some of our family and friends over to our house (finally) and I am hoping this forces us to get around to putting stuff up on the walls and maybe looking for some more furniture the fit our house needs. So today, despite still feeling blah with a sore throat and a cloudy head, I'm going to try to straighten things up a bit. But before I get started with that, I am enjoying my cup of coffee and flipping through Pinterest and Etsy for some decorating ideas. Here's what I came across so far...
We've been looking for the right wine rack, and I love that this displays the wine AND the wine glasses, which means we wouldn't have to keep our glasses up on the very top shelf in the kitchen. Plus I think this is a simple enough design that E might even be able to make it with the leftover wood from the previous flooring.
I would really love to incorporate shelves that can house books, pictures, and maybe some trinkets or plants. I love that these are different and funky, but also uniform so they don't look too weird.
I really want to put a corner shelf in the kitchen I can store our cookbooks and some more decorative kitchen appliances on then and open up some of the cupboard space. That way the cookbooks can be out and easy to grab too!
This is a cute cabinet, and while it doesn't match our home style, I really like the idea of having a colored/decorative backing to the shelf to give it more flare.
I love love LOVE these honeycomb shelves, but I don't think E does. Actually, I know he doesn't, but I wanted to give them some credit here because they are so cool!
That's all for now. who knows what we will actually end up doing and if we'll end up getting it done soon or not, but hey, a girl can dream!
XO
Tuesday, March 5, 2013
My first blanket - finished!
Once upon a time last February I found some extra blue yarn and a hook and thought, "maybe I will make a blanket." My idea was that the whole process would be faster if I made several 25x25 stitch squares and then stitched them together. It made the most sense to me, especially since at the time I only knew how to do your basic chain/single stitch (still not even sure if that's what you call it). I posted this post on Feb. 29, 2012 and my plan was to make one GIANT blanket for E and I after we got married.
Well, on March 3, 2013, I finally knotted the last stitch and called it finished. It's not the GIANT blanket that I originally envisioned, but it's big enough to cover most of us if we're sitting on each end of the couch, which we usually are. I have to say though, despite lacking in size, it's prettier (and warmer) than I imagined it would be. I want to take it places with me and show it off because I am so excited about it.
I couldn't get the colors quite right in the photos, but the soft tones add to it's comfy and coziness. My mom taught me the double crochet stitch and how to make the little windows, which sped up the process of joining all the rows together, and I love the effect.
Now E wants me to make a REALLY REALLY BIG one. I'm game, but I need to find a pattern I can figure out, some really BIG yarn, and a BIG hook, because the idea of a REALLY REALLY BIG blanket using only single stitches sounds like I'll be sweating under a half-made blanket, working away in the middle of summer, and that doesn't sound as fun.
I'm excited to have one project under my belt, and I am ready to start another. Right now I am playing around with some crocheted hearts and looking around for the right yarn/pattern for blanket #2. If you've got suggestions, please pass them on!
XO
Friday, December 21, 2012
And the stockings were hung....
Sure one's a little wider than the other. And that other is a little bumpier than the first. But HEY! That's what makes them special. I learned a lot making these stockings, just like I've learned a lot in this first Christmas being married.
They aren't quite finished yet. I'm planning of finding some cute iron-on letters, an "E" and an "A" to properly claim our stockings...so Santa knows which one to fill with gifts (mine) and which to fill with coal (not mine!). Just kidding! ;)
XOXO,
Me
Tuesday, November 27, 2012
Christmas Crafting
I can't believe November is almost over. What happened and where did that time go?
Seriously. I don't quite know how I feel about it almost being Christmas. For sure, when we picked an October wedding date, we didn't really think about the fact that we'd be throwing ourselves smack into our first holiday season. It's like we've had to hit the ground running and just go with it, even though we have no idea what we're doing. It's really the hardest time of year to start off. Traditions are different, you have to buy gifts for family members, and you're a couple, not just your own person shopping around. It's totally different, and honestly a little scary and intimidating.
But, I feel like there really isn't anything to do other than just go with it and learn along the way (is there another way? Some kind of tip or trick? Please share ....NOW). To take the edge off the changes and the sort of scariness of it all, I turn to something more creative. Being that it's our first Christmas, we don't have your standard Christmas go-to items, including stockings. I always had some really awesome stockings growing up, and I wanted the ones that E and I start out with to be special, so I thought I would make them. It's a big thing because I really am not skilled at using my sewing machine. The last thing I made was a few years back when I sewed E and I Fred and Wilma Flintstone costumes for Halloween. And that was with a lot of help from my mom. While she is still showing me the ropes and answering my texts of help, I've gotta do this one on my own, which is bittersweet, but exciting.
We went to pick out the material last week, and today I finally got around to cutting the pieces out. I've got to work on it slow and steady, but get it done soon enough to enjoy them in the season. Hopefully they come out looking fabulous and are just the right size to hang from the stocking.
Lots of changes this holiday season, and I'm hoping we (me, E, and the family) get through them smiling and in one piece, happy and merry and bright.
XO
Sunday, August 26, 2012
New Feature- Project Sunday!
I wanted to bring back the crafty-ness of my Project Do Something posts, so I've decided to make it a regular part of my blog. Introducing: ::drumroll:: PROJECT SUNDAY! When there's something crafty going down, you can expect to hear about it on a Sunday post! Here's the first post!
Back in February when I started my "project do something" concept I started working on a blanket (you can read about it's beginnings here and here). It was such a big task ahead of me, especially with such a busy year, but I was (and still am!) determined to make it happen. There has been progress!
When I started working on the blanket, I realized I didn't want to make one huge piece, because it would be too difficult to carry from room to room to work on once it got big, and it would be too hot to work on once it got too hot. So I decided to work in small 25x25 stitch squares. Let me remind you all that I don't know how to crochet any fancy stitches, this entire blanket is going to be done in single stitch squares. At some point I'm going to have to learn how to stitch the squares together (and possibly another pattern for embellishment, but I'm going to leave that one as a surprise!), but for now, all I am doing is making squares.
I finally used up all the blue yarn and started in on the grey. I have 12 squares of blue and hope to have the same amount in the grey, and then the black, though if there is less black, I'll be OK with that, since that's what I'm using to stitch the squares together as well. I'm hoping to have a hodge-podge tile effect. I may need to make more squares before putting it all together - I really want this to be a big cozy couch blanket.
But seriously, this has been more fun than I thought. I don't really get to work on it too much (as you can tell, it has been like 6 months...) but when I think about it, and especially since I've been sick, it's been something fun to work on while resting.
Progress. I can't wait to see it complete, but working on it is that much fun too!
Back in February when I started my "project do something" concept I started working on a blanket (you can read about it's beginnings here and here). It was such a big task ahead of me, especially with such a busy year, but I was (and still am!) determined to make it happen. There has been progress!
When I started working on the blanket, I realized I didn't want to make one huge piece, because it would be too difficult to carry from room to room to work on once it got big, and it would be too hot to work on once it got too hot. So I decided to work in small 25x25 stitch squares. Let me remind you all that I don't know how to crochet any fancy stitches, this entire blanket is going to be done in single stitch squares. At some point I'm going to have to learn how to stitch the squares together (and possibly another pattern for embellishment, but I'm going to leave that one as a surprise!), but for now, all I am doing is making squares.
But seriously, this has been more fun than I thought. I don't really get to work on it too much (as you can tell, it has been like 6 months...) but when I think about it, and especially since I've been sick, it's been something fun to work on while resting.
Progress. I can't wait to see it complete, but working on it is that much fun too!
Saturday, April 14, 2012
PDS 8: Will you be my bridesmaid??
It was definitely a crafty sort of day, and the weather outside made it even nicer to be warm and toasty in my sweater, inside, with the heat on, Pandora playing, and a nice cup of hot coffee. So, like I promised yesterday, today's blog would bring back Project Do Something and tie in some fun wedding stuff as well, which is how Bacheegs and Love originally got started.
So, ever since Eric proposed back in April of 2010, I've been thinking about my bridesmaids. I am very fortunate to have some very lovely ladies in my life, and I wanted to ask them in a very special way to make this a fun experience for us all. I looked around online and got inspired by this blog post on Wedding Chicks. I loved that it made asking the girls something special, but since I didn't have the details to write about yet (I have yet to pick out dresses and shoes, etc.), I wasn't sure what to put inside the box. So I just decided to get started and go with it. Soon enough, I thought, "Why not give each girl a "bridesmaid" shirt?" I'm still not sure when we'll all wear it (I suppose when we go dress shopping, or maybe on the day-of, when we're getting ready?), but I thought it was super cute.
Here's what I did to make a special treat for my girls!
The supplies. Everything sort of evolved out of several trips to Michael's and the paint came from our paint drawer here at home. The box idea was mainly from the previous blog - and such a good deal at Michael's. The hard part was finding enough good quality boxes (sometimes they don't open/close just right) for all my girls - and I don't even have that many! I did a smaller version of this box for my lovely cousin Madi, who will be my Jr. Bridesmaid.
So basically there's the box, some white and purple paper for the interior, paint and brushes, the shirts (courtesy of the amazing Terri and her Etsy Shop Rhine Designs!), some sparkly lettering (also from Michael's, and then embellishments. I used purple and white flowers and yellow gold tinted sticky pearls, as well as purple and white glittery dots.
Step 1: Painting
Step 3: The inside and putting it all together!
It was absolutely so much fun watching (or hearing) everyone's reaction as they opened up the box. One of my best friend's was living in San Francisco at the time, so I had to mail her package up and told her something was coming, but that she couldn't open it til I was on the phone with her. It took about a day's coordination after it arrived, but it was so awesome. It's such a neat feeling to know your friends are excited to be there to support you on your big day.
To all the brides-to-be out there, I totally urge you to be crafty and do something special for your girls, it makes the memories even more exciting to make and they will be cherished forever! What other ideas have you seen out there? What are you planning on doing?
So, ever since Eric proposed back in April of 2010, I've been thinking about my bridesmaids. I am very fortunate to have some very lovely ladies in my life, and I wanted to ask them in a very special way to make this a fun experience for us all. I looked around online and got inspired by this blog post on Wedding Chicks. I loved that it made asking the girls something special, but since I didn't have the details to write about yet (I have yet to pick out dresses and shoes, etc.), I wasn't sure what to put inside the box. So I just decided to get started and go with it. Soon enough, I thought, "Why not give each girl a "bridesmaid" shirt?" I'm still not sure when we'll all wear it (I suppose when we go dress shopping, or maybe on the day-of, when we're getting ready?), but I thought it was super cute.
Here's what I did to make a special treat for my girls!
The supplies. Everything sort of evolved out of several trips to Michael's and the paint came from our paint drawer here at home. The box idea was mainly from the previous blog - and such a good deal at Michael's. The hard part was finding enough good quality boxes (sometimes they don't open/close just right) for all my girls - and I don't even have that many! I did a smaller version of this box for my lovely cousin Madi, who will be my Jr. Bridesmaid.
So basically there's the box, some white and purple paper for the interior, paint and brushes, the shirts (courtesy of the amazing Terri and her Etsy Shop Rhine Designs!), some sparkly lettering (also from Michael's, and then embellishments. I used purple and white flowers and yellow gold tinted sticky pearls, as well as purple and white glittery dots.
Step 1: Painting
I went with purple because I am hoping this will be the color of my 'maid's dresses (like I said, we're still looking!). The bracket design was traced from a stencil, and I hand painted it in.
Step 2: The outside
I was able to ask my first few girls right around Valentine's day, so I thought I would surprise them and play up the whole Valentine theme. It totally worked! Some of the girls just thought the inside would just say "Valentine!" Mission Accomplished!
Most of the embellishments are stick-on so there was minimal glue required for the outside (YAY!). I just went with what I thought looked best!
Step 3: The inside and putting it all together!
I lined the inside top and bottom with a textured purple paper, and then re-traced the bracket design on the inside on a textured cream paper and glued that in. Using the same embellishments and letters, I finished the inside. Once folded and wrapped in tissue paper, the shirts actually fit perfectly into the boxes. I bought some pearly white stationary and wrote each girl a special note about our friendship and asking them to be in my wedding, Sealed it up and placed it inside of the box.
It was absolutely so much fun watching (or hearing) everyone's reaction as they opened up the box. One of my best friend's was living in San Francisco at the time, so I had to mail her package up and told her something was coming, but that she couldn't open it til I was on the phone with her. It took about a day's coordination after it arrived, but it was so awesome. It's such a neat feeling to know your friends are excited to be there to support you on your big day.
To all the brides-to-be out there, I totally urge you to be crafty and do something special for your girls, it makes the memories even more exciting to make and they will be cherished forever! What other ideas have you seen out there? What are you planning on doing?
Friday, March 16, 2012
PDS 5/Wrapped bottles
It's time to get crafty again. This has by far been the easiest project. I literally finished the whole thing in about 10 minutes, standing up in my kitchen. The inspiration? I've been seeing a lot of yarn wrapped bottles on Pinterest and other blog sites (here and here). It's such a simple touch to add to a bottle, but it really steps up the look of it, and makes the bottle become a little bit splashier and more fun for decor.
BUT - I sort of have this thing about yarn. Unless it's being used for a blanket or scarf, or some article of clothing, I really don't want to be touching it. Especially if it's going to be used as a vase, where it could potentially get wet, or sticky... No Thank You.
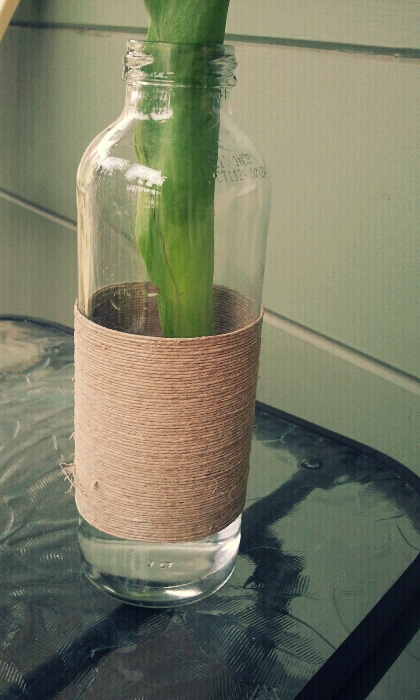
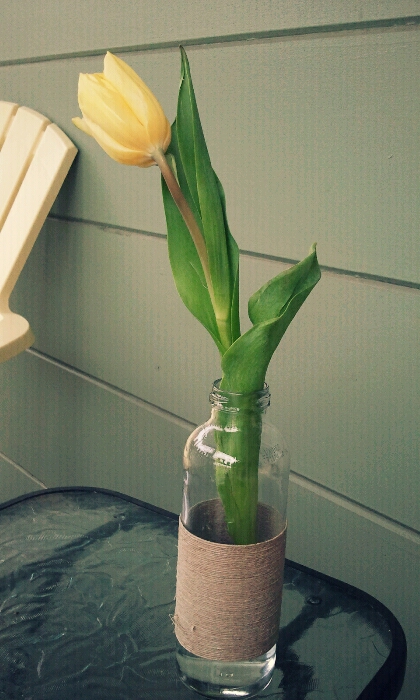
So I decided to put my own spin on it and use hemp cord (also because I have a WHOLE BUNCH of this at home left over from some project many years ago). It's nice because it has the look of twine, but it's not as rough on the hands, and doesn't really absorb water much.
I had the bottle left over from some very tart lemonade I bought the other day. I love bottles, so I never tossed it, hoping something like this project might come along to save it. To start, I just tucked in the end and started wrapping over it, tightly, around the bottle. When I covered enough of it, I cut the end and thought, "great, now how do I finish?"


Fortunately, some brilliant person created Mod-Podge a while back, and it worked like a charm! all I had to do was hold the cord in place and brush some of that magic glue goo onto about the first 5-6 layers of cord on both ends. I held it in place for about 5 minutes and then let it dry the rest of the evening. And VOILA! An instantly groovy vase.

I still have quite a bit of cord left, so I am hoping to save up some more fun looking bottles and start a little collection of wrapped vases in different sizes. Perfect for a kitchen table or window sill!
Subscribe to:
Posts (Atom)